Sunday, September 29, 2013

100 Pounds of Tomatoes - Canned

Two years ago I had decided that I wanted to can enough tomato sauce to last our family for the year. Of course I decided to do this when it was winter and there were no fresh tomatoes to be found. So, I told myself that that would be my goal for the summer. Well, summer came and with it I was HUGE pregnant. It was also a drought. I made the wise choice to sit with my feet up instead of can any amount of tomatoes.

Fast forward to this summer. I am not pregnant, there is not a drought, and there is still the need.....so I made a small batch of tomato sauce to sort of get the hang of it. We have a farm share through a local farm and when we started getting lots of tomatoes I saved them. My test batch was a success. It was easy but time consuming.
I never actually weighed this bunch at all, but this amount of peeled and seeded tomatoes gave me only 4 half pints. I was then looking around trying to find something to do with all the skins, cores, and seeds (I really hate to have any waste) and I found that you can process them the same as the meaty part of the tomato. You may have to spend a few minutes pushing it all through a strainer but there is quite a bit of flesh left on the back of the skins. So, into a pot all that went...
And I started cooking it down....
Then I pushed it though a strainer.....
It was thick smooth and perfect. I ended up getting another 4 half pints out of the skin, seeds, and cores.

Now that my test batch was such a success...I sat down and did some tomato math. Trying to estimate how much tomato sauce one family might use in a year. Then trying to figure out how many tomatoes are needed to result in said amount of sauce.

I started by looking at my cooking habits. I make something tomato based a minimum of once a week...sometimes two or three times. So, I knew I needed at least 52 pints (most of my recipes use a pint). A bushel of tomatoes is 53 lbs. and I found many differing opinions on how much sauce you could get out of that. Lots of it has to do with how thick you want the sauce. I decided that 2 bushels would be a good place to start.

I was smart enough to realize that pushing 100 lbs of tomatoes through a hand held strainer would be silly, so I bought a food mill. As for tomatoes, I found a decent price at one of the local farm stands. $18 for a half bushel. I called and put in my order. My tomatoes were ready for pickup on a gloomy rainy Sunday.
Holy.Crap. That is a lot of tomatoes.

I decided to just skip the blanching, peeling, squeezing step on my first go around since I planned on processing all that stuff anyway.

Big huge fail. It had to cook down overnight...it was actually faster to blanch, peel, and squeeze the tomatoes and process the 'waste' stuff later.

So, I started processing tomato sauce...and I kept processing tomato sauce. Finally, a week later...after staying up till midnight or later every night...I had 64 pints of tomato sauce and 16 pints of salsa.
Oh, and the jars on the left in a different color are apple sauce. My sister has some apple trees and she brought me a couple of boxes of apples.

I also did a small batch of peaches earlier in the summer.
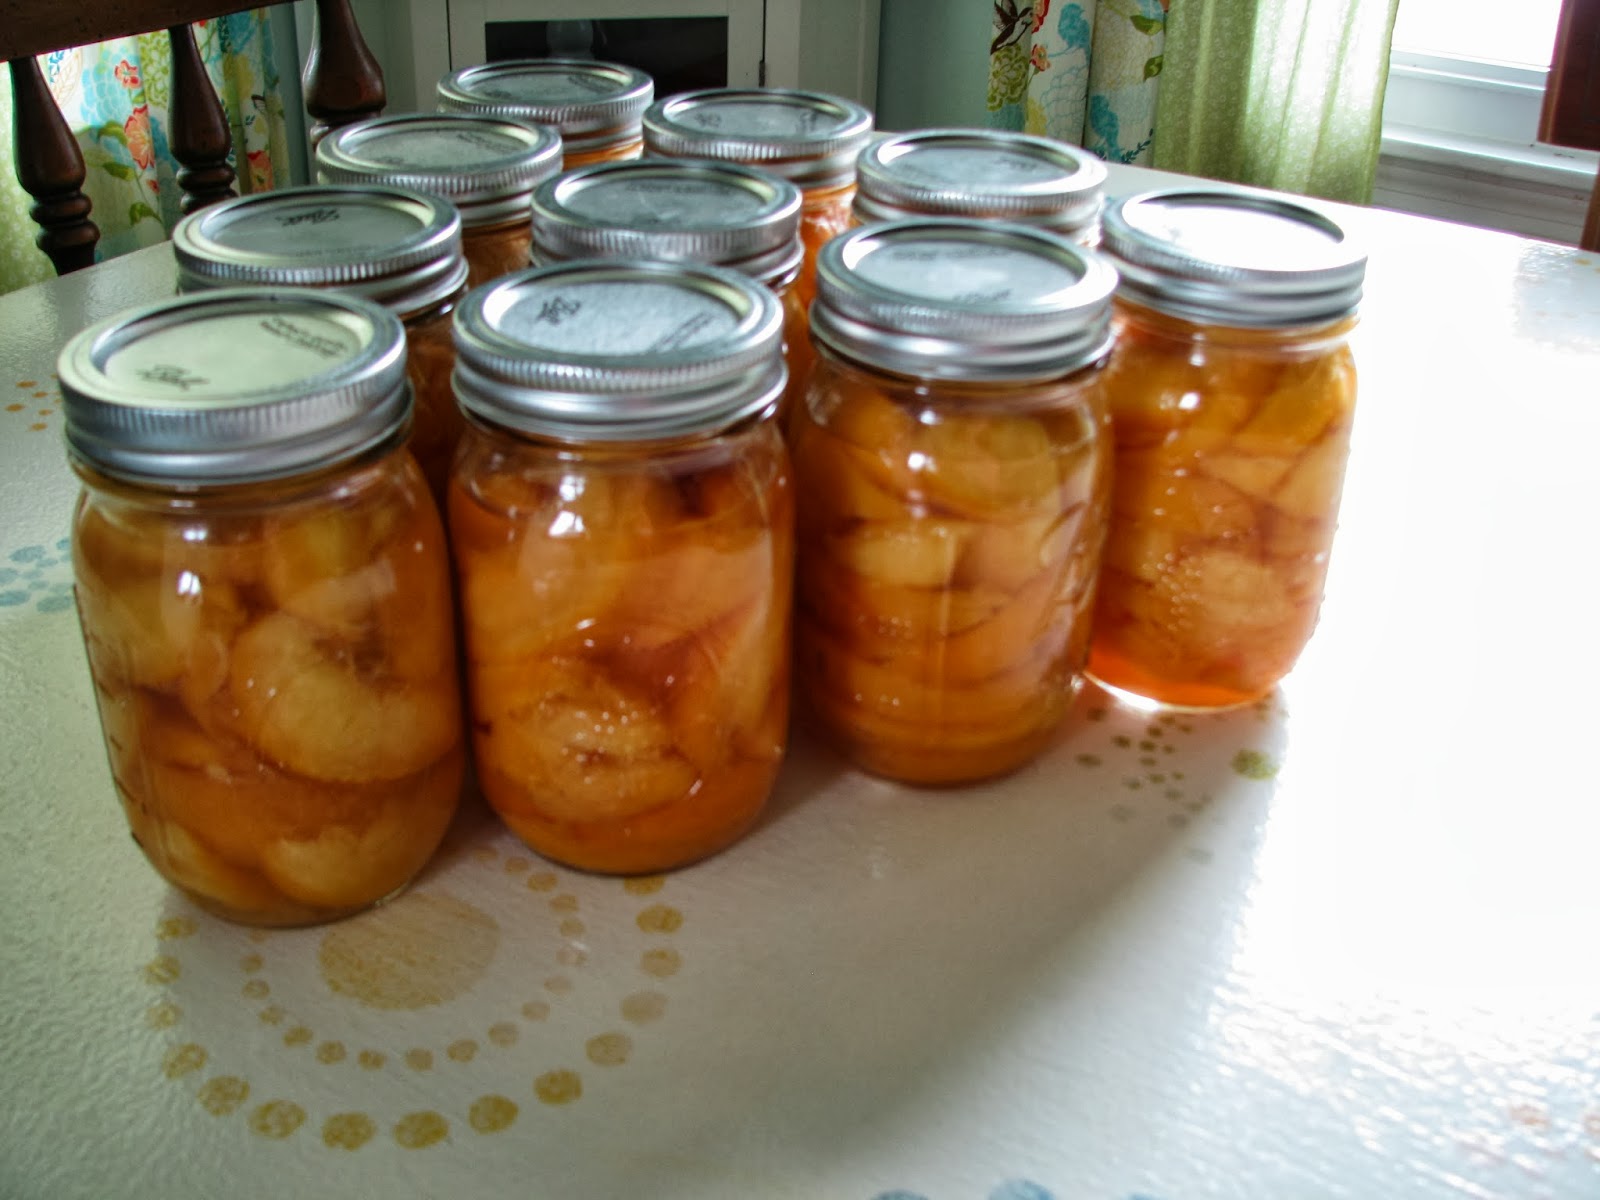


I still want to make a batch of salsa verde with some tomatillos and some more applesauce, but essentially, my canning is done for the year. I am quite excited to have so much yummy goodness for my family for throughout the year. I will try to go bigger next year and do some diced tomatoes and some other veggies.




Thursday, September 19, 2013

Bias Tape

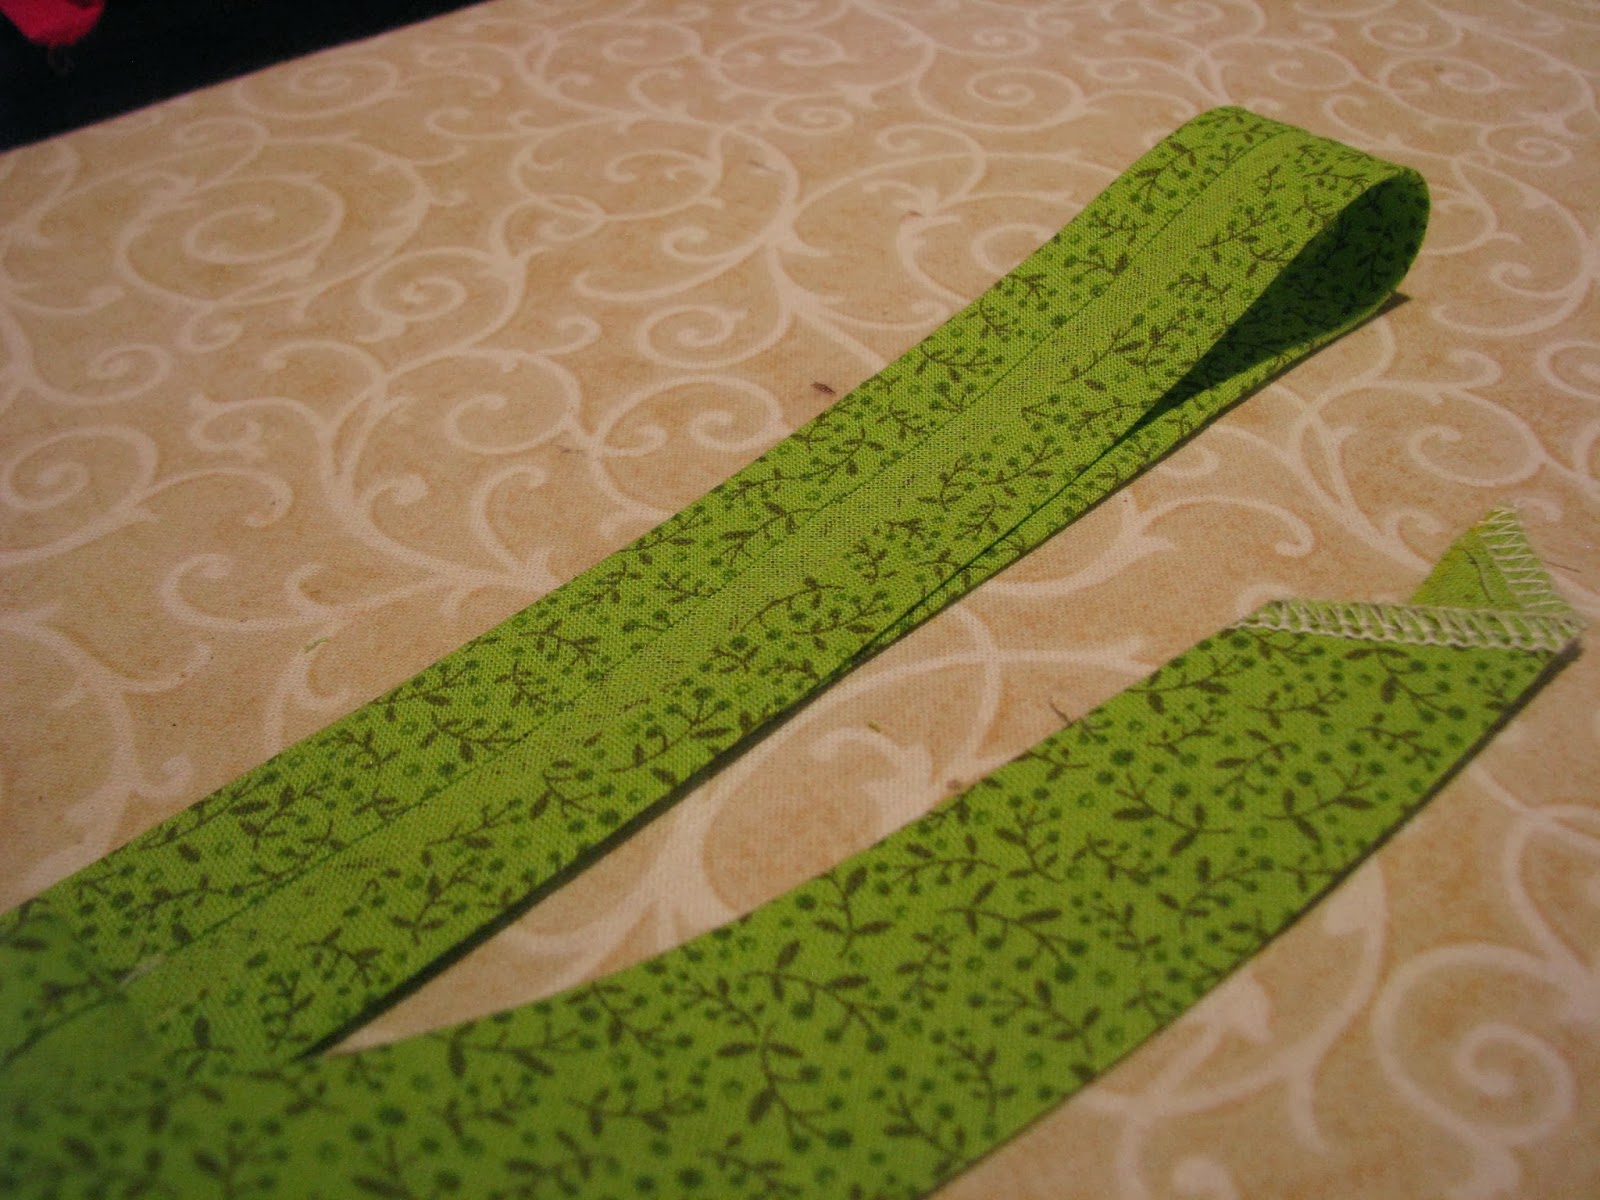
I have a project  that I'm working on that needs double fold bias tape. Have you ever gone to the store and seen the pitiful selection of bias tape out there? Well, as I'm always telling my mom, "Google is my friend." After a quick search I found an awesome tutorial with a short cut for making bias tape.

Since the tutorial has already been done, I will just post my pictures....

My bias tube.


Close up of tube showing the cutting lines.

Me cutting.

Big pile of fabric all cut out...

Using my 'thingy' to make single fold bias tape...

Close up of single fold bias tape...

Making the double fold....


Wind it all up on some cardboard and you have custom Yoda green double fold bias tape!

I promise I will put up a post with the project this will be going on.


Monday, September 9, 2013

A Birthday Dress...Ice Cream Style!

Somebody turned 1! How in the world did time fly by sooo fast?
I of course had to make a birthday dress for Miss Faye. I bought fabric a few months ago that I just loved and knew I had to use (the one on the right is the main fabric, I also got the blue to go with it...the red was for a different project).
 I just never really found a pattern I liked. Then I got busy with life and almost decided to not make a dress at all. Well, I decided the day before her party that I was going to make a dress and that I would again make the Ice Cream dress from Oliver + S. I just made one a couple of weeks ago that turned out GREAT! There are a couple of different style options for this dress. I decided this time to go with the color blocking option. I added a top layer again (I really wanted to show off the fabric that I got a few months ago. I had the royal blue fabric that I had picked up at JoAnn's, and I also had a beautiful light teal that I had picked up at Hobby Lobby. I still needed 1 more color to pull off the color blocking so I dragged all 3 kids to a local quilt shop after I picked the boys up from school. There, I picked up a great jewel tone royal purple by Michael Miller from the Krystal collection.

I got home and tossed my new fabric in the wash at around 4:30 pm. Then it was dinner and bed time for all the kids...by the time I sat down to start the dress it was 11:30 pm. The party was at 11:00 am the next day. I knew I was going to not be sleeping much if I wanted to pull this off.

I cut and pieced and sewed and altered the pattern to suit my vision...then I sewed some more. I had to go crash around 2 am. Faye woke up at 5:30 to nurse so I got back up after a much too short nap. I fed her and then went back to sewing. The house started waking up around 7:45 or so. I had to pause to wake up Mr. Cassie so he could take care of the kids...the dress was not done. I also called my mom to come over and help with the kids and party set up. I went back to sewing. Around 10:30 I stopped to go jump in the shower so I could sort of look presentable for the party. I got out of the shower, got dressed and then still had to finish the dress. I was sewing the button on as the first guest arrived. And what a lovely button it was!
I kept the little 'V' notch in the collar this time
 ...and the color blocking with the overlay turned out adorable!

 The party was great...the weather was perfect, and Miss Faye looked awesome in her new Ice Cream Dress.


We of course took it off of her for cake...we don't want to mess up such a cute dress!

All in all, it was worth it. I would stay up late again working my butt off for her. She is totally worth it. She fits into the madness that is our family sooo well!
Happy First Birthday Miss Faye.


Wednesday, September 4, 2013

An Organized Workspace

I keep accumulating more things ribbons, fabrics, books, thread, yarn, etc... and I have such a small workspace/sewing area that it was beginning to be so cluttered. I would have to move a pile out of the way to cut out fabric. Then, I would move the pile out of the way to get to one sewing machine, then the other. And on and on and on. I was drowning in sewing supplies. Yet.... you can never have too many supplies. What I needed was to utilize the wall. Shelves would need to go up. I found some awesome floating shelves....crazy expensive is what they were. Part of the reason I have taken up sewing so much is to save money. So, I hit up our local hardware store and picked up some cheap particle board shelves with some brackets. I even splurged an extra $2 and got two brackets that would hold a dowel rod for my ribbons!

Here is my little corner of the basement/playroom. I still have boxes and bins full of fabric and old clothes to cut up for fabric under all the tables. I'm also thinking of getting one more shelf.

See my window....no I really don't drink that much.

The other side of my little corner. More bins and boxes of fabric under my cutting table. The containers on the wooden desk are all different colored snaps. Another window full of wine bottles. I swear I don't drink that much. I keep collecting them to paint though!


Here is my stash of yarn. I need to figure out a better way to keep it all up on the shelf. Maybe some wire bins turned on their sides? I will keep trolling pinterest for some ideas.
Here are my sewing books and the awesome hand spun wool I got from the farmer's market.

Here are my useable fabrics and scraps and my thread. On the right I used a magazine holder to put my patterns....it is stuffed pretty full right now so I need to come up with a different solution for that.
 I also left space for another thread holder. I have the thread to fill it but need the money and the time for another trip to the store.
Here is my cutting table with my planning bulletin board over it...right now it is covered with patterns I need to put away. The table is just a standard 4 foot folding table that was raised up by using some PVC pipes (I forgot to take a picture of that but you can sort of see them in the top picture)

Here is my dowel rod ribbon holder. Only room for a little bit more ribbon so I will need to figure out more storage space for more ribbons soon. I will wait until that point comes to think about  it though. To the right of the shelf you can see my crazy huge roll of fleece. I also have miscellaneous supplies on this shelf; paper crafts, elastics, bias tape, lace, glues and interfacing.
 Now I have until Saturday to sew a birthday dress for Miss Faye! It is nice to have room for all the sewing!


Thursday, August 29, 2013

A Baby Shower Gift.


My nephew and his wife are expecting their first baby. I think babies are just awesome and should be celebrated. I saw this great basket over at Noodlehead some time back and I just knew I had to make it. So, when I found out someone in the family was having a baby I jumped on that pattern! 

Here is the completed basket full of baby goodies! It just about killed me to wait to find out the colors they were using for the nursery. I wanted to buy fabric and get started the day I found out! I did wait though. Everyone likes different colors and has different 'styles' and I wanted the gift to be something that they would enjoy and use.

Fabric

The expecting couple finally
 registered and they indicated that the nursery was going to be done in orange, green, and light beige. They had some small dark brown items on the registery so I used that info and hit the local fabric stores and quilting shops. It was like I hit a brick wall. Everything I could find in those colors was ugly, or floral (not great for a boy), or had other colors mixed in. I usually like to buy local if I can but I had to shop online for the fabric this time. Someone had recently given me the link to a great online fabric store and I hit the jackpot there!


Basket
I started the project with the actual basket. The Noodlehead pattern was super easy to follow and it turned out beautifully. I also bought a pattern for a bag from them that I can't wait to make!


I picked the dark brown...called Rings in Brown by Dear Stella for the outside and a fun pop of orange...called Sweet Zig Zag in Orange by Lori Whitlock  for the inside. The trim is Rings in Cream by Mankower UK. After some digging I found out that the nursery was painted in the green, so I wanted this to compliment and not blend in. I also had in the back of my mind that it could be used out in the livingroom; possibly stuffed with some diapers, wipes, and extra burp cloths.


Swaddler
 Next up a made a fleece lined swaddler. Gail from over at Probably Actually has made a couple and they are just perfect! For the swaddler I went with Kulla in Orange by Lotta Jansdotter on the outside and some thin Malden Mills fleece (I bought this in bulk 6 years ago when I was on the cloth diaper making kick...I have something like 100 yards of it still) on the inside.


Crib Sheets
 I also made crib sheets in a nice soft flannel. The crib sheets in the store are all the same and all boring. I made these from an online tutorial I came across here. The fabric is Typewriter Text in Pistachio by Robert Kaufman


 Burp Cloths

For these, I just hit up my local cloth diaper store and bought the super absorbent Unbleached Indian Prefold diapers. I gave them a wash and dry to quilt them up a bit, then I added a simple binding on the ends. Super easy and cute! I have seen others that put the 'fun' fabric as a strip up the middle of the diaper but they are sooo good at absorbing and cleaning up spit up as is, I didn't want to mess with a good thing. If they were telling the baby's name I might have embroidered that down in the corner. For these I used the same brown rings fabric from in the basket, as well as the green flannel that was used in the sheets. I also used Squared Elements in Orange and Jungle Animals in Orange by Allison Cole.


Wash Cloths

For the wash cloths I used a microterry that I have had for some time (also from the cloth diaper making stint). For 3 of them I completely backed the wash cloth with some of the fabric. Then for the others I surged the edges of the microterry and then added a decorative strip...making sure to include all the fabrics from the project. I had to tie it all in some how!

Clothes
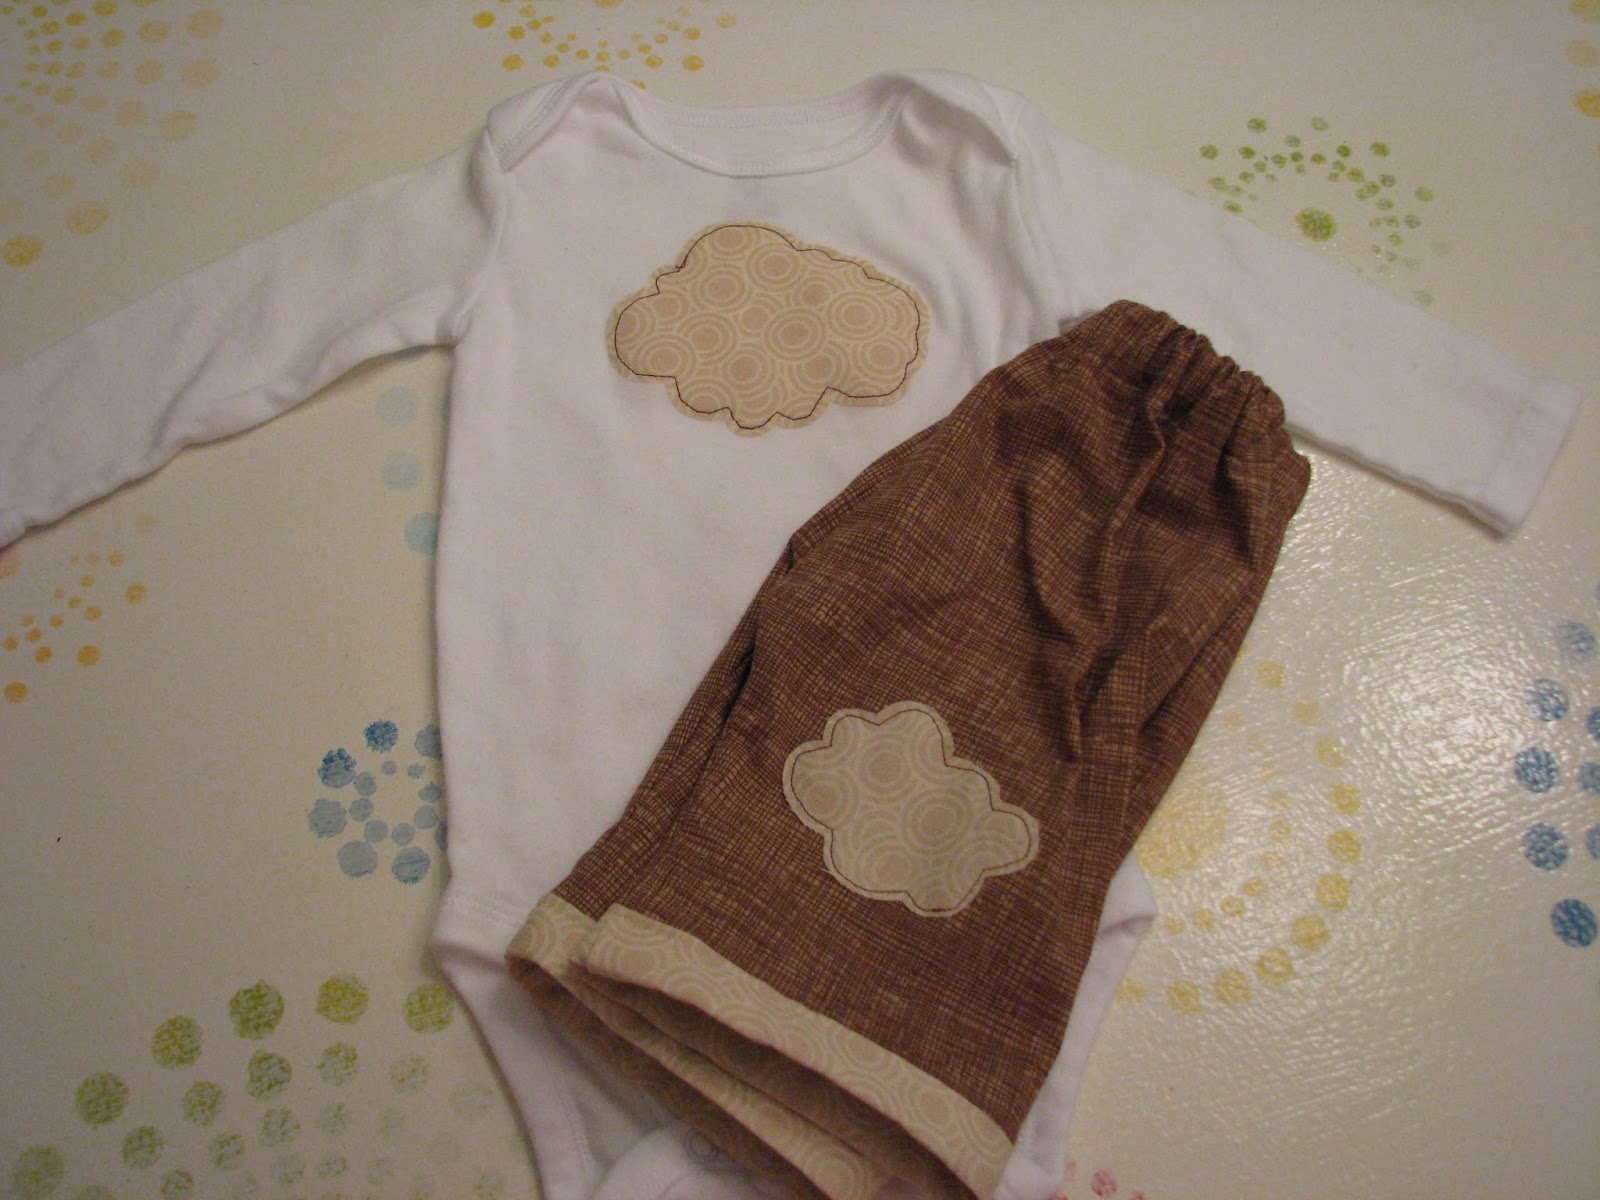
Finally, I appliqued some onsies with fun stuffs! I did a bow tie with the Squared Elements in Orange. Then I did a regular tie with a scrap from my huge pile of scraps. Then on the last onsie I did a cloud. The cloud was to match the pants I made. The pattern for the pants was a free one from Made-by-Rae. They were super easy to make and just completely adorable! The main fabric for the pants was Crosshatch Sketch in Caramel by Timeless Treasures.


Baby Shower Gift

Here is everything all ready to be stuffed in the basket. I also tossed in some baby body/hair wash, the best diaper cream that I have come across after 3 kids, and some bamboo nursing pads.

I had so much fun putting this together. It was a good 3 weeks of sewing every time I could stick the boys in front of their video games every moment the kids would let me sit down. Lots of sewing until late in the night after the kids were all in bed as well. Now I can't wait for someone else to have a baby so I can put together another one!